Using custom Java versions
Legacy Launcher uses Mojang's recommended Java builds by Microsoft. This guide will help you to replace these Java versions with the ones of your choice.
This page requires localization of screenshots. Feel free to open PR if you want to help
How to?
- Install required Minecraft version
- Open launcher settings, select "Minecraft" tab and open Java settings
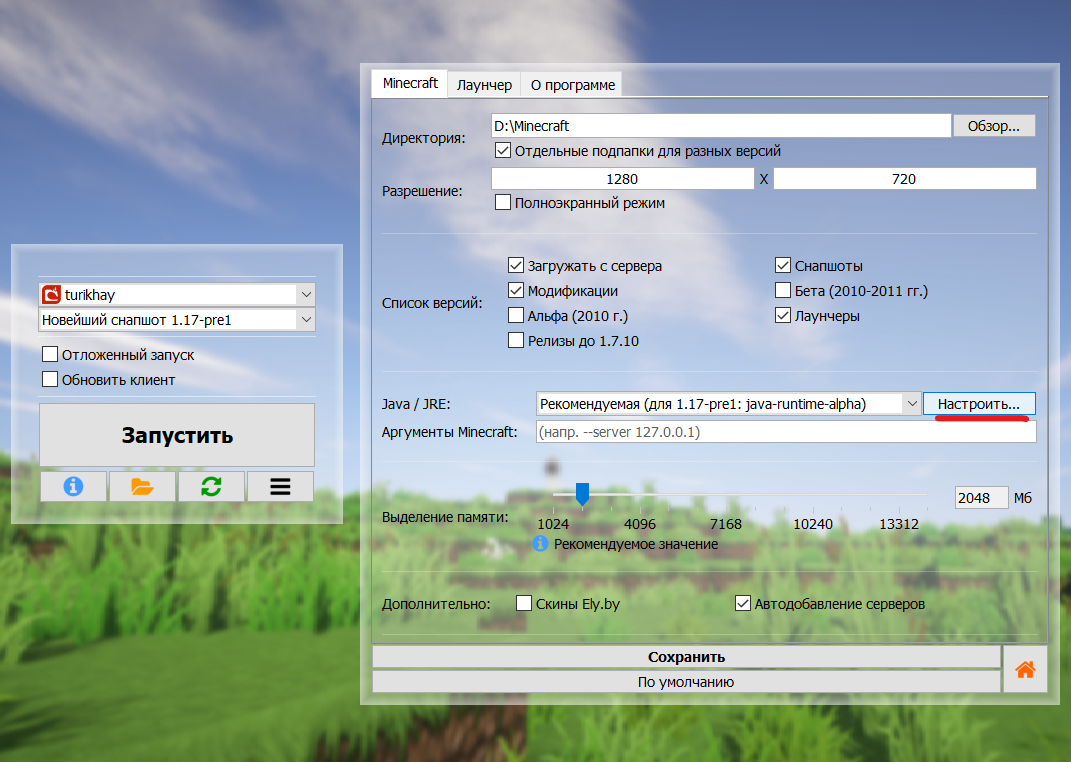
- Select "Recommended" option
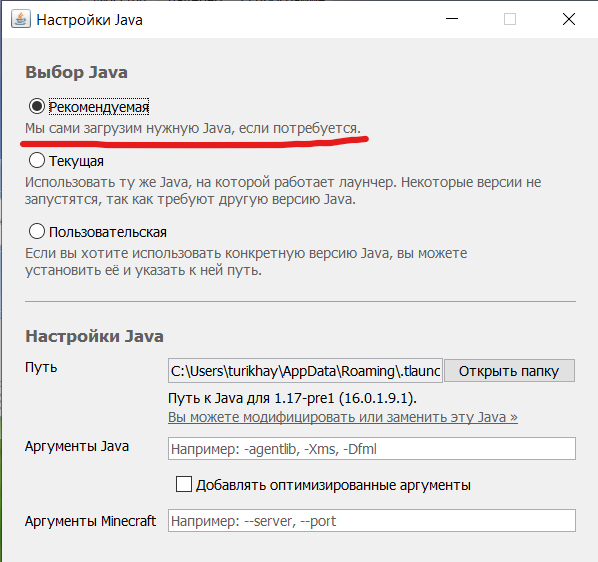
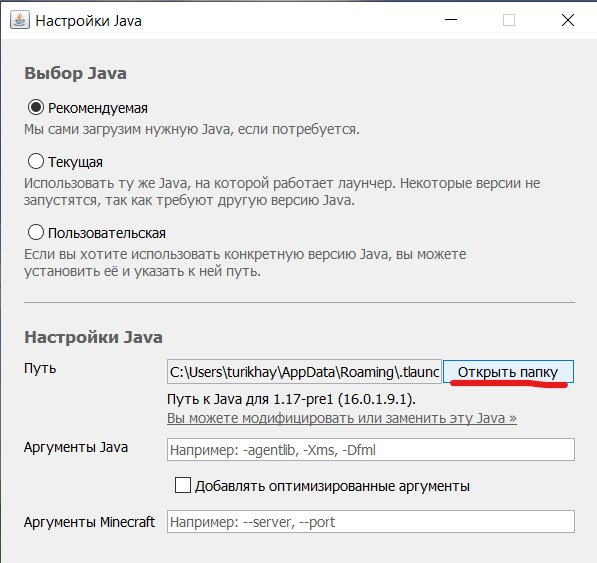
- Click "open folder"
- In the folder, create a file named
override, e.g.override.txt
- Done! This Java version is customized, and can be freely modified or replaced
Simplified method
Due to complaints about the stability of Mojang recommended Java builds we have prepared a ready-to-use package to replace Java with more stable ones.
- Download the archive:
- For 32-bit Windows
- For 64-bit Windows :::note[Sources]. Java versions for these archives are taken from open sources: Adoptium Temurin (Java 8, Java 17) and AdoptOpenJDK (Java 16) :::
- Open the launcher settings, select "Minecraft" tab and go to Java settings
.
- In the window that opens, select the "Recommended" option
- Click "Open Folder"
- In the opened folder, twice move up a level.
tip
If you see folders named
java-runtime-alpha,java-runtime-beta,java-runtime-gamma,jre-legacythen you have done everything correctlywarningIf you see the
.versionfile next to a folder and/or don't see any other Java folders, or seelibandbinfolders - you're probably in the wrong folder - Replace folder contents with the one from the downloaded archive.
- Run the launcher and the game
Setting custom JRE using the launcher settings
This method will override Java for all Minecraft versions. Make sure you switched Java back to "Recommended" when changing Minecraft version or modpack!
- Download and install required Java version
- Open the launcher settings, select "Minecraft" tab and go to Java settings
.
- In the window that opens, select the "Custom" option
- Click "Browse" button near the Path field and select
bin/java.exe(for Windows) orbin/java(for Linux/macOS) executable for installed Java versionDefault Java install locationsWindows: Check Java installer settings. In most cases it will install Java to
C:\Windows\Program Files
Linux: Most package managers will install Java under/usr/lib/jvmpath
macOS: In most cases you'll find installed Java under/Library/Java/JavaVirtualMachinesand~/Library/Java/JavaVirtualMachinespathswarningWhen pasting Java path manually make sure there are no quotes surrounding the path
- Click "Done" button
The Hard Way
This method is recommended for experienced users only
This method is recommended for modpacks and custom versions
- Start Legacy Launcher
- Click "Open game folder" (the one with folder icon) button to open game folder

- Launcher may ask you to select a folder. You should select "root folder"
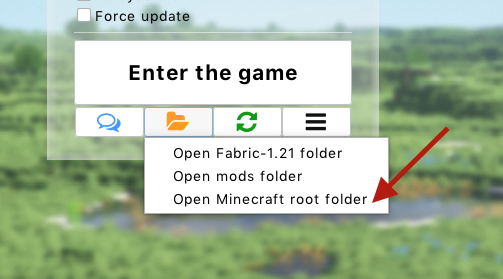
- Launcher may ask you to select a folder. You should select "root folder"
- Open
versionsfolder
- Find the version you want to use specific JVM
tip
You may want to clone this version
- Open the version json file with any text editor (e.g. Notepad++)
note
You should not use any office suite!
- Find
javaVersionblock - Change
componentfield value with chosen one:noteThis list may be incomplete. You can view all available JVM versions here.
jre-legacyfor Java 8java-runtime-alphafor Java 16java-runtime-betaandjava-runtime-gammafor Java 17java-runtime-deltafor Java 21java-runtime-epsilonfor Java 25
- Save json file and restart the launcher. The version should now use selected Java version.
note
"Force update" checkbox will revert this change back to normal.